Multisite Integration
Domain Mapping System fully supports multisite networks.
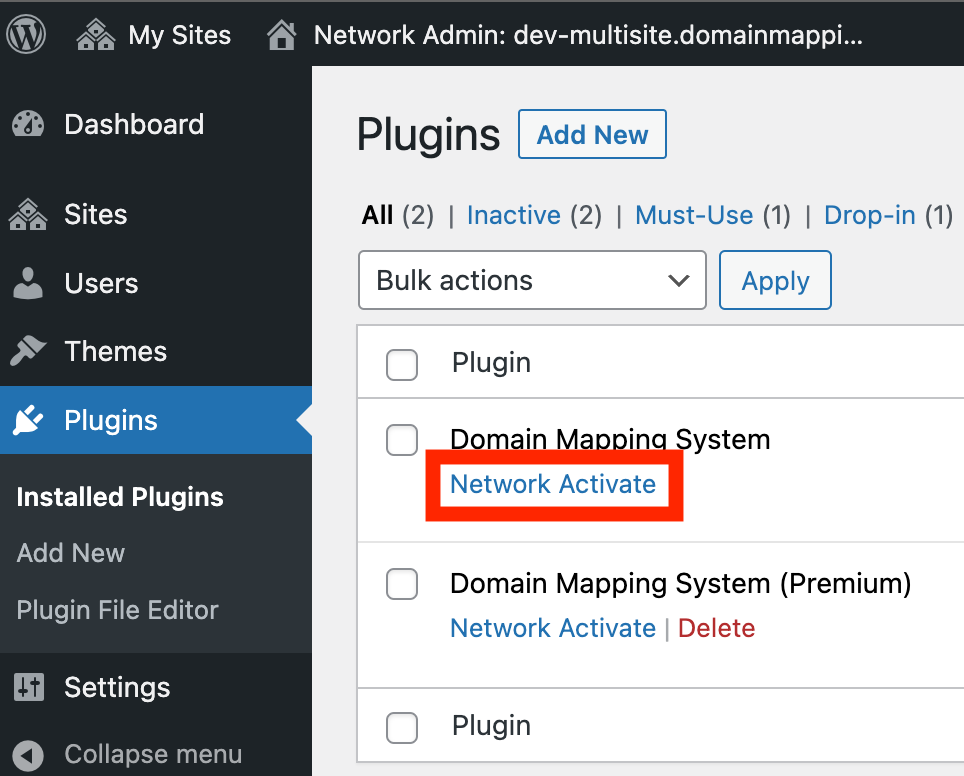
To get started with Domain Mapping System on a multisite, install the free plugin on your Network Admin > Plugins page. Then, click "Network Activate," as seen in this screenshot:
After activating the plugin on your multisite network, go to any of your network sites, and click Domain Mapping on the WP-Admin menu bar.
You'll notice the following notification at the top of the settings area, which covers two steps you need to take to activate Domain Mapping System on a multisite network:

It looks like you are using a Multisite Network. To enable Domain Mapping System for multisite, add the following string to your wp-config.php file in /home/712913.cloudwaysapps.com/vwnnjkafun/public_html/ above the line reading /* That's all, stop editing! Happy publishing. */.
define( 'SUNRISE', true);
You must also copy and paste the sunrise.php file from /home/712913.cloudwaysapps.com/vwnnjkafun/public_html/wp-content/plugins/domain-mapping-system/ to the directory /home/712913.cloudwaysapps.com/vwnnjkafun/public_html/wp-content
Modify wp-config.php File
The first step is to modify your wp-config.php file, which is typically located in the public_html directory of your hosting server (or your corresponding root public directory, which may go by a different name).
To modify this file, you'll need access to your server's File Manager or FTP/SFTP connection. Contact your hosting company to get access to modify the files if you don't already have it.
Once you've got the file open, scroll to the bottom, near the line /* That's all, stop editing! Happy publishing. */
Then, add the following line directly above that:
define( 'SUNRISE', true);It should look something like this:

Ensure you've saved the file, and move on to step two.
Move the sunrise.php File into wp-content Directory
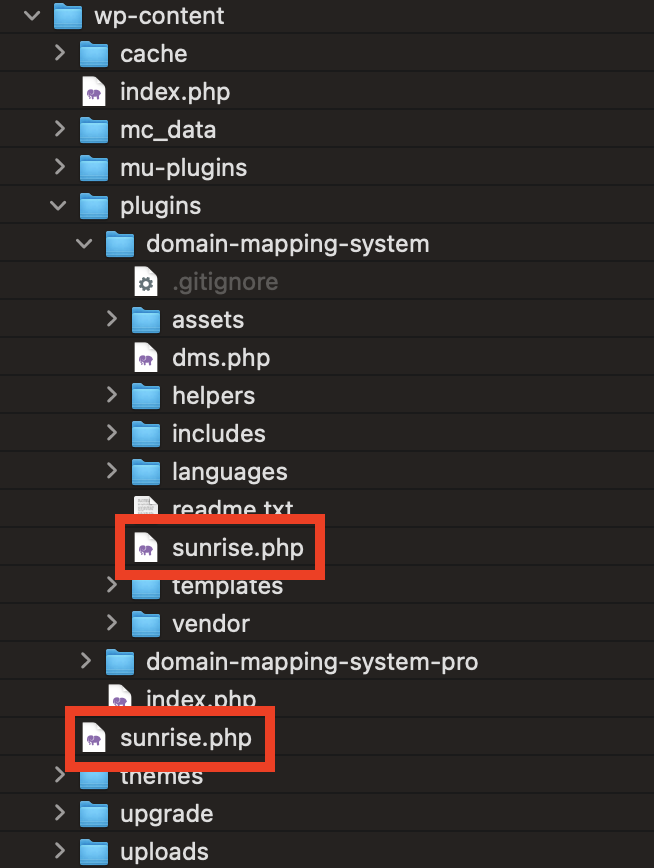
The second step is to move the provided sunrise.php file into your wp-content directory. The plugin includes a file called sunrise.php in the main plugin directory. Now that you've installed the plugin, navigate to the directory public_html/wp-content/plugins/domain-mapping-system/ in your File Manager or FTP/SFTP browser.
Duplicate the sunrise.php file found in the plugin directory.
Then, move the duplicated file to the wp-content directory.
The duplicated file will have been automatically renamed, so change the name back to sunrise.php.
Your wp-content directory should look something like this:
The reason for keeping the original in place is in case anything ever happens to the duplicated file - you'll easily be able to replace it with the latest version.
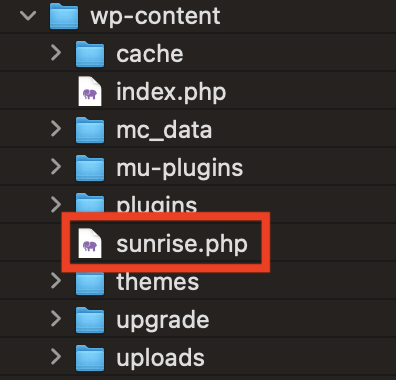
Here's how it looks only in the wp-content directory (closed).
sunrise.php File in the wp-content Directory
Once you've completed the two steps above, go back to your WP-Admin Dashboard and refresh the page.
When the plugin detects the proper configuration, the notification will disappear.
Feel free to switch between your sites and map domains!
Ensure every mapped domain has been configured properly by following our Quick Setup guide.
Alias Domain Authentication Requirements
If you are trying to configure Alias Domain Authentication or Subdomain Authentication on a multisite, you must update the sunrise.php to change this string from this:
if ( ! is_multisite() || $is_admin ) {
    return $site;
}
To this:
if ( ! is_multisite() || ! $is_admin ) {
    return $site;
}